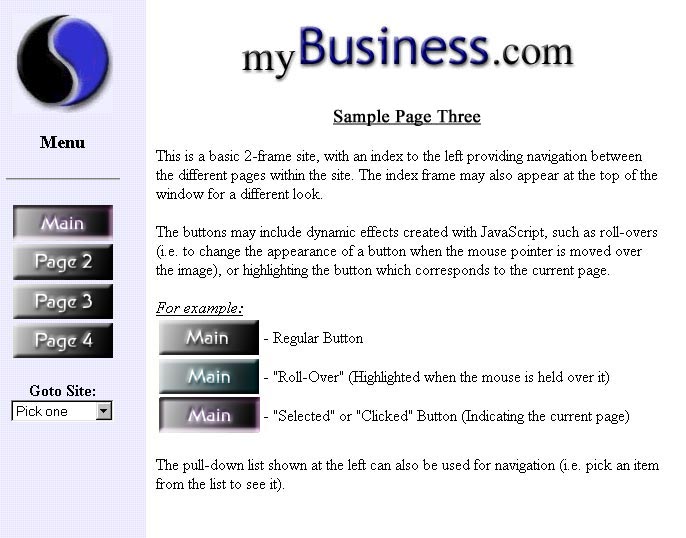
Sample Layout #3:

Picture of Sample Three